Winterizing your RV takes 2–3 hours and can save you thousands in spring repairs. Water expands when it freezes — even a small amount left in your pipes can crack lines, damage fittings, and cause water damage throughout the interior. This guide walks you through every step, from draining water systems to proper storage, plus a 12-point checklist at the end you can follow as you go.
Why Winterizing Your RV Matters
One burst pipe from a single overnight freeze can mean $500–$3,000 in repairs — and that's before accounting for any water damage to cabinetry, flooring, or upholstery. Beyond plumbing, winter weather degrades exterior seals, drains batteries, fades interiors, and creates ideal conditions for pests looking for a warm place to nest.
The math is simple: a few hours of prep now versus a spring repair bill. Every step in this guide exists for a specific reason — skip one and you risk the problem it's designed to prevent.
What You'll Need
Essential supplies:
- 2–3 gallons of non-toxic RV antifreeze (pink, not automotive — automotive antifreeze is toxic and will ruin your water system)
- Basic tools: wrench set, screwdrivers, pliers
- RV water pump converter kit or hand pump
- Air compressor (optional but recommended)
- Mild detergent and RV wax
- Weather-resistant sealant
- Moisture absorbers
Helpful but optional:
- Breathable RV cover
- Tire covers
- Battery trickle charger
- Water heater bypass kit (highly recommended — without it you'll waste 6–10 gallons of antifreeze filling the water heater)
Most of these you likely already own. The non-toxic RV antifreeze is the one must-have purchase — budget $15–$25 for a 2-gallon supply.
Step 1: Drain All Water Systems
This is the most critical step. Any water left in the system can freeze and cause damage — the goal is to get it all out before antifreeze goes in.
Fresh water tank: Open every faucet in the RV — kitchen, bathroom, shower, and outdoor — and locate your fresh water tank drain valve. Open it and let everything drain completely. If you have an air compressor, blow out the lines after draining to remove any residual water.
Water heater: Turn off the power first — either the electric breaker or the gas supply. Open the pressure relief valve, then remove the drain plug with a wrench and let it drain completely. If you have a water heater bypass kit, install it now so antifreeze doesn't fill the tank in the next step. Without the bypass, you'll waste most of your antifreeze filling a 6–10 gallon water heater that doesn't need it.
Holding tanks: Dump your black and gray water tanks at a proper dump station. Clean with RV tank cleaner and flush with water to remove residue before storage.
Step 2: Add RV Antifreeze
With everything drained, antifreeze protects the pipes from any residual water that the drain and blow-out didn't catch.
How much do you need? Most RVs need 2–3 gallons. Larger motorhomes may need 4–5. Buy an extra gallon — it's cheap insurance.
Pumping antifreeze through the system:
Connect your antifreeze bottle to the water pump using a converter kit and turn on the pump. Starting with the faucet closest to the pump, open it and run until you see pink antifreeze coming out, then close it and move to the next. Work through every faucet in order — kitchen, bathroom sink, shower, outdoor shower. Flush the toilet until antifreeze appears in the bowl. Finish by pouring a cup of antifreeze down each drain: sinks, shower, and tub.
The goal is pink antifreeze out of every water outlet. If you see clear water at any point, keep running until it turns pink.
Step 3: Protect the Exterior
Winter weather is hard on seals, finishes, and rubber components. A few hours of exterior prep prevents damage that's expensive to fix.
Clean and wax: Wash the RV thoroughly with mild soap and dry it completely. Apply a coat of RV wax to protect the finish from UV exposure and moisture. This is also a good time to inspect for any existing damage before it disappears under a cover for the season.
Seal gaps and cracks: Inspect around windows, doors, slide-outs, and roof fixtures. Apply weather-resistant sealant to any gaps or cracks — this is where water gets in and where freeze damage originates. Replace old or cracked weatherstripping and check the roof carefully for soft spots or deteriorating sealant.
Cover vulnerable areas: Use a breathable RV cover — not a plastic tarp, which traps moisture underneath and causes the mildew it's supposed to prevent. Cover tires to block UV damage and cracking. Make sure roof vents have covers that allow ventilation without letting in precipitation.
Step 4: Prepare the Interior
A clean, dry interior prevents mold, mildew, and pests through the winter months.
Remove everything perishable: All food — including sealed non-perishables — should come out. Even packaging attracts rodents. Remove personal items and valuables. Empty the refrigerator, clean it thoroughly, and prop the door slightly open to prevent mildew.
Deep clean: Vacuum all carpets and upholstery, wipe down all surfaces with disinfectant, and clean appliances thoroughly. Any organic residue left in the RV is an invitation for pests.
Control moisture: Place moisture absorbers throughout the interior — in cabinets, closets, and living areas. Leave cabinet doors and drawers slightly open for air circulation. Cover furniture and mattresses with breathable fabric covers, not plastic sheeting. If you have power access at your storage location, a small dehumidifier is significantly more effective than passive moisture absorbers alone.
Battery care: Disconnect the main battery and any auxiliary batteries. Clean terminals with a wire brush to remove corrosion. Store batteries somewhere that won't freeze — a heated garage or basement is ideal. Use a trickle charger to maintain charge through the winter; a fully discharged battery in freezing temperatures can be permanently damaged.
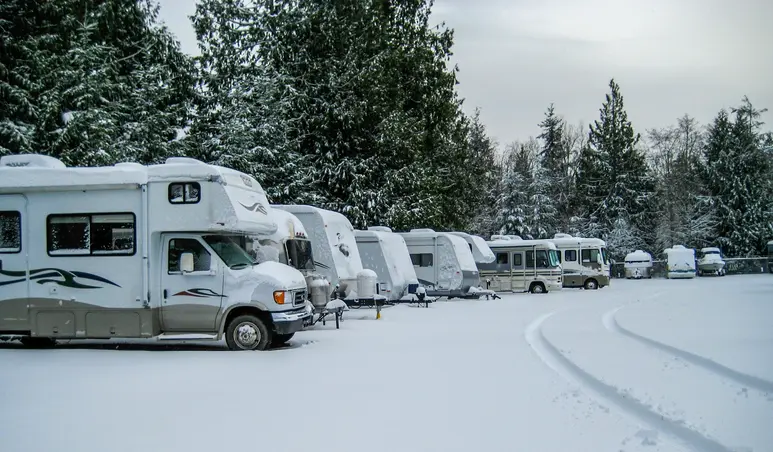
Step 5: Store Your RV Properly
Where and how you store your RV matters as much as the winterization itself.
Storage options:
For outdoor storage, a quality breathable cover is essential. See our full RV storage guide for a detailed breakdown of what to look for in a storage facility.
Security: Lock all doors, windows, and storage bays. Close and latch all vents. Add a hitch lock to prevent towing and consider wheel locks for additional protection. Verify your storage facility has gated individual-code access, surveillance cameras, and adequate lighting.
Monthly check-ins: Visit your RV once a month if possible. Check for water leaks around windows and the ceiling, look for pest activity (droppings, chewed material, nests), check tire pressure (tires lose 1–2 PSI per month), and air out the interior for 15 minutes. Move the RV forward 1–2 feet to prevent flat spots from forming under sustained weight.
Getting Your RV Road-Ready for Spring
When temperatures are consistently above freezing and you're ready to use the RV again, don't just start the engine and drive. Work through these checks first.
Flush the antifreeze: Connect to a fresh water source and run all faucets until the water runs completely clear and tastes clean — no pink color, no antifreeze taste. Flush the toilet multiple times. Drain and refill the fresh water tank 2–3 times. Replace the water filter if your system has one.
Reconnect and refill: Remove the water heater bypass if you installed one, fill the water heater, and reconnect all batteries. Inspect all plumbing connections for leaks — check under sinks, around the toilet base, and at the water heater. Even a small drip during winter can mean a loose fitting that needs tightening.
Mechanical inspection: Check all fluid levels before starting the engine. Inspect belts and hoses for cracking or brittleness — cold temperatures accelerate rubber degradation. Look underneath for any leaks. Set tire pressure to proper driving PSI (not the maximum storage PSI you used for winter). Start the engine, let it idle for 5 minutes, and check that all gauges read normal. Test brakes in a parking lot before driving on roads.
Test everything: Run the generator for 10 minutes. Test all appliances — refrigerator, stove, oven, AC, and heater. Check electrical outlets. Test slide-outs if you have them. Verify the propane system functions properly and that connections are secure.
Clean and restock: Wash the exterior, clean the interior, and air out the RV for several hours before your first trip. Restock essentials: fresh water hose, sewer hose, leveling blocks, first aid kit, toilet paper, kitchen basics, and a flashlight with fresh batteries.
12-Point RV Winterization Checklist
Use this checklist as you work through each step:
Water Systems
- Drain fresh water tank completely (all faucets open)
- Drain water heater (power off first, bypass kit installed)
- Dump and clean black and gray water tanks
Antifreeze
- Pump antifreeze through all faucets until pink
- Pour antifreeze down all drains (sinks, shower, tub)
- Add antifreeze to toilet bowl and flush until pink
Exterior
- Wash, dry, and wax exterior
- Seal windows, doors, slide-outs, and roof fixtures
- Install breathable RV cover and tire covers
Interior and Storage
- Remove all food and perishables
- Deep clean interior, empty and prop refrigerator open
- Place moisture absorbers, disconnect and store batteries
Common Winterization Mistakes to Avoid
Using automotive antifreeze: It's toxic and will contaminate your entire water system. Only use non-toxic pink RV antifreeze — it's specifically formulated to be safe for potable water systems.
Skipping the water heater bypass: Without it, your 2–3 gallons of antifreeze goes straight into the water heater tank instead of the pipes. You'll use 6–10 gallons to fill the heater before antifreeze reaches the lines.
Forgetting the outdoor shower: That outside shower you haven't used all season still has water lines that can freeze. Run antifreeze through it like every other faucet.
Leaving propane on: Turn off propane at the tank. Most storage facilities allow propane tanks to remain on the RV, but the valve should be closed during storage.
Not checking in monthly: Pests can move in within weeks. Leaks can develop. Tires deflate. One monthly visit catches these issues before they become serious problems.
FAQ: RV Winterization
How much does it cost to winterize an RV? DIY winterization costs $30–$50 for antifreeze and basic supplies. Professional winterization at an RV dealer or service center typically runs $100–$200 depending on the size of the RV and your location.
Can I use compressed air instead of antifreeze? You can blow out most water with compressed air, and it's a good first step. But antifreeze provides protection against any residual water the air didn't reach. Using both — blow out first, then run antifreeze — is the most thorough approach.
Do I need to winterize in a mild climate? If temperatures at your storage location drop below 32°F even occasionally, yes. A single overnight freeze is enough to burst a water line. If you're genuinely in a climate that never freezes, you can skip antifreeze — but draining the system and cleaning the interior are still worth doing.
How long does winterization protect my RV? The antifreeze protects your water system for the full winter. You'll need to flush it out and repeat the process the following fall. There's no expiration on RV antifreeze sitting in the lines — it stays effective until you flush it.
Can I store my RV with a full propane tank?Yes. Propane doesn't freeze and is safe to leave in the tank during storage. Turn the valve off at the tank. Check your storage facility's specific rules — most allow propane, but some have restrictions on quantity.
What temperature is too cold to skip winterization? 32°F is the threshold — water freezes at that temperature. If your storage location sees 32°F or below at any point during storage, winterize. Don't gamble on a mild winter.
Ready to store your RV this winter? Bolt Storage offers gated outdoor RV parking with 24/7 surveillance at locations across the East Coast. Month-to-month rentals, no long-term commitment required. Find a location near you or call 866-300-2658.
Find Storage Units Near You Up To 50% Off
Discover nearby storage units with up to 50% off at Bolt Storage. Affordable solutions for your storage needs. Find convenience without the high cost.
PRICE MATCH GUARANTEE
We will beat any price in town

%2520(1).webp)


.jpg)